Build Your Dream Shower: A Step-by-Step Guide to the Perfect Walk-In Shower Base
Dreaming of a walk-in shower in your home? Or wondering how to install a walk-in shower base? Building a walk-in shower can be very satisfying, giving you creative freedom. A walk-in shower also adds to the aesthetic appeal of your home.
For any building project, the most important aspect is its foundation. A good shower is only as good as its base, which is the first step toward building an exceptional walk-in shower. What the finished product promises is comfort and luxury.
Like in any DIY journey, you should precisely follow well-curated instructions to ensure you build a firm foundation for your shower.
This blog breaks down those instructions so you can easily understand and learn the best way to build a walk-in shower in seven steps.
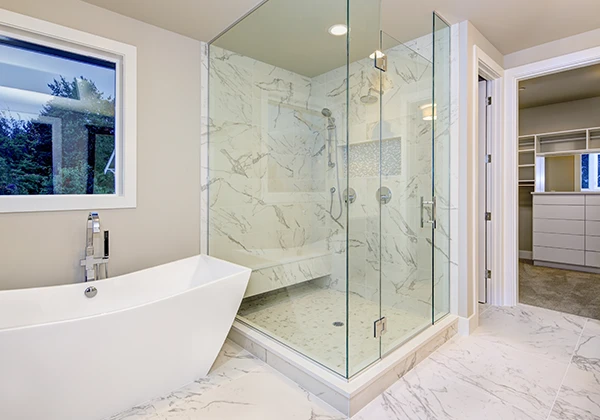
What to Know Before You Begin?
Before you begin, some precursors require your attention. It is worth investing time to assess and understand the following:
- Strength Check: The first step is critical for avoiding structural damage in the future. Inspect to ensure your floor joists and subfloor can support the weight of the mortar, tile, and water used in a shower.
- Outline Your Vision: Use a pencil to draw the dimensions of your shower directly onto the floor and subfloor. The sketch serves as a visual reference during the construction process.
- Clearing the Way: Remove drywall 6 feet above the intended shower space and in its immediate vicinity. This provides sufficient room for installation.
- Solid Support: Install 2-by-6 lumber blocks between each floor-level stud space to strengthen the shower base's structural integrity. Screw these blocks tightly together to create a solid foundation.
- Plumbing Considerations: Redesigning the entire bathroom? It is the perfect time to inspect the plumbing conditions and move or install new plumbing lines. If you want a sauna-like experience, consider wiring for a potential steam shower during this stage.
Building a Strong Foundation
Once the foundation is laid, it's time to construct the physical structure supporting your walk-in shower.
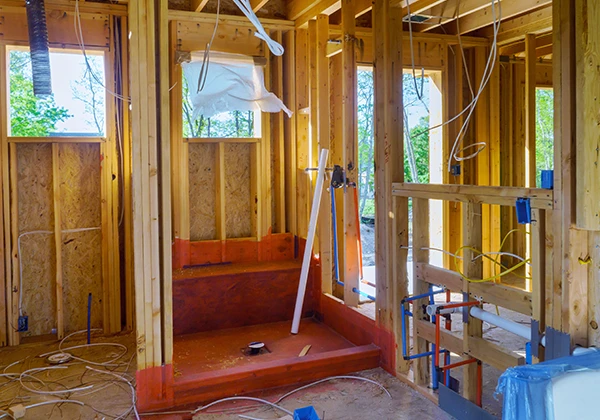
Creating the Curb
Building a curb out of 2-by-4 lumber will define the shower's perimeter and prevent water from escaping. Stack and screw these boards together to form a well-defined edge.
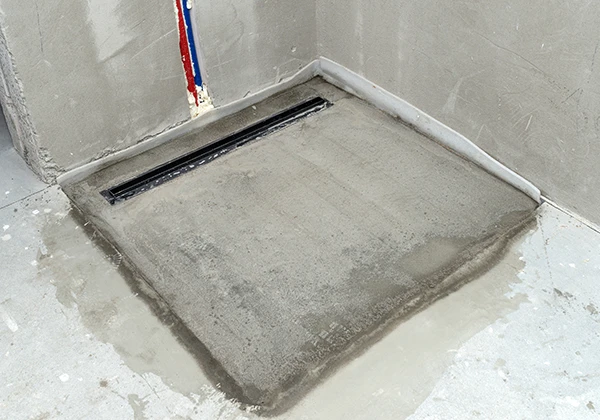
Crafting the Mortar Subfloor
This layer creates an inclined foundation for optimal water drainage.
- Mix mortar according to product specifications and pour it into the shower area.
- Use level and screed blocks to create a smooth surface with a slight incline that directs water down the drain.
- Install the drain, keeping the top half accessible for future modifications.
- Allow the mortar to cure overnight, giving it enough time to firm up.
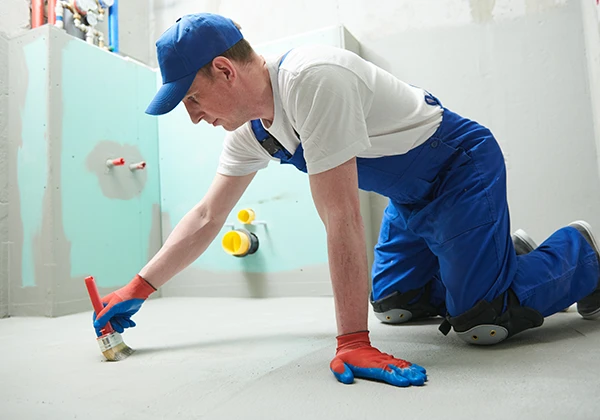
Ensuring Waterproof Protection
- Laying the Waterproof Membrane: To construct a watertight barrier, carefully roll a PVC shower pan membrane around the base and curb.
- Securing and folding: Nail the top edge of the membrane to the wall. To ensure a seamless seal, fold the excess material neatly into the corners and caulk them.
- Revealing the Drain: Cut the outer layer surrounding the drain to expose it for future tile installation. Caulk the cut edges, then rebuild the drain to ensure a watertight connection.
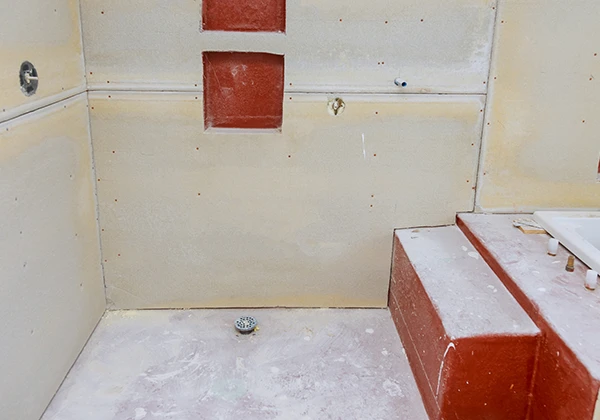
Cement Board Installation and Reinforcement
- Vapor Barrier: Follow building codes by placing a plastic sheet or felt paper over the wall studs to prevent moisture entry.
- Installing Cement Board: Attach cement board panels directly to the walls, ensuring a tight fit against the mortar subfloor and curb. This provides a stable foundation for tile adhesion.
- Caulk for Protection: To prevent water seepage, fill the spaces between the cement board and mortar bed with caulk. To attain a smooth finish, conceal exposed screw heads with caulk.
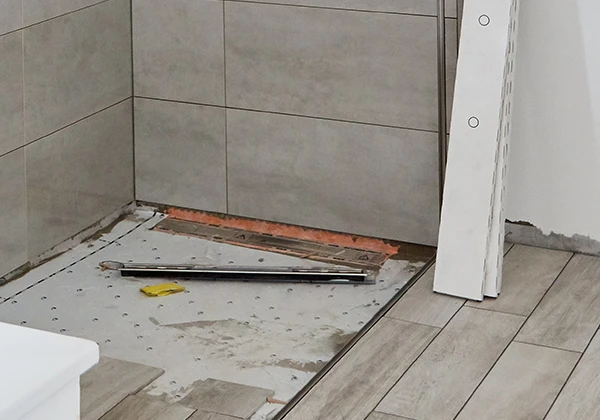
Strengthening with Expanded Metal Lathe
Reinforcement Layer: Applying a layer of expanded metal lathe over the mortar flooring will improve the shower base's integrity. Leave the drain and a small border around it uncovered to make room for tile installation.
The Final Step – Pouring Mortar

Completing the Base:
- Leveling Up: Draw a reference line 1.5 inches above the subfloor's height around the shower's perimeter. Adjust the drain height to provide optimum drainage and a flat platform for tile installation.
- Final Touches: Mix and pour the final mortar bed, smoothing it gently to ensure a flat, even surface suitable for tiling.
- Curing Time: Let the mortar bed cure overnight to firm the base and prepare it for the final tiling.
Voila! Your Walk-In Shower Base is Ready!
It isn't rocket science! You have laid a firm shower base with a proper plan and following the product specifications. Now, move on to the next stage. Use your imagination! Churn those creative juices to personalize your shower space with beautiful tiles. Modern walk-in shower ideas can inspire you to make your space both functional and stylish. Your walk-in shower should be an extension of your distinct personality and style.
What is best - DIY or a Professional Contractor?
Building your shower base gives you a sense of accomplishment while saving money. However, it takes skill, patience, and a willingness to tackle potential issues. Unsure of doing it yourself? Want a stress-free experience? Hire the best bathroom remodeling services to ensure your shower base is leak-proof and long-lasting. You can also look into the best shower remodeling services for professional guidance.
Cost Comparison:
- DIY Shower Base: $150-$200
- Professional Shower Base: $800
- Preformed Fiberglass Pan: Like a professional installation
Eventually, it is up to you whether you want to do it yourself or engage the services of a professional contractor. Whatever you choose, take pleasure in watching your walk-in shower take shape. The result is all that matters. Each shower you take will be an unforgettable and rejuvenating experience.
Summary
Walk-in shower installation is a significant investment, but it can be accomplished with proper planning and budgeting. By understanding the costs involved in walk-in shower installation and considering your personal needs and preferences, you can install a fully functional walk-in shower that you'll enjoy for years.
If you want to install a state-of-the-art walk-in shower base, RemodelYourHome is your answer! Our network of contractors is up to date with the latest styles and technologies in building a solid shower base. Whether prefab or custom-built showers, our contractors will ensure the foundation offers stability and reliability. Don't settle for outdated designs—let RemodelYourHome connect you with the best in the business. Contact us today to get started on your dream walk-in shower adventure!

Remodel Your Home
We are a leader in the home improvement space with over 20 years of experience pairing homeowners with construction experts.
About Us